Using SVN via Eclipse and Subclipse
by Sophie Engle on Aug 2013
This guide shows you how to use SVN via Eclipse using the Subclipse plugin (like, for example, when you test your code remotely on the lab computers).
Installing Subclipse
You will need to install the Subclipse plugin to connect your code in Eclipse to your SVN repository.
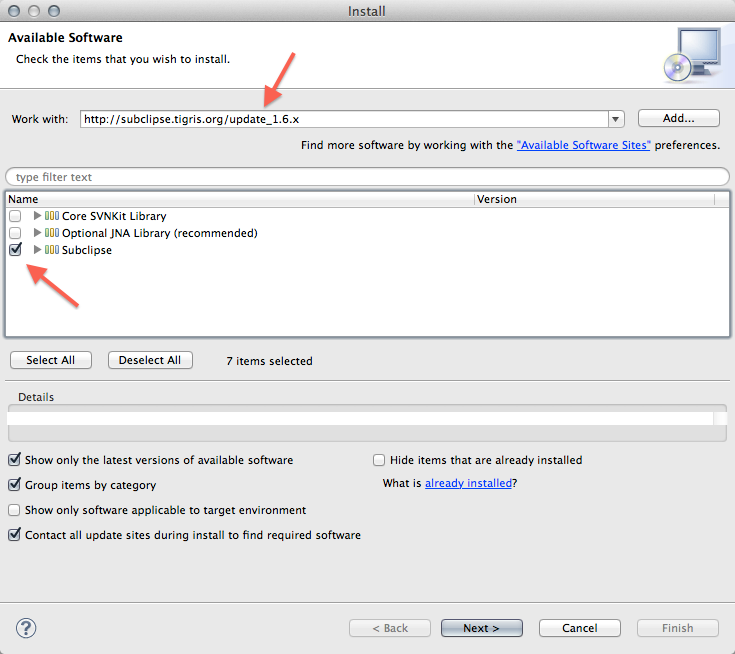
In Eclipse, go to "Help » Install New Software..." from the toolbar. We are currently running Subversion version 1.10.x, so you need to place the link http://subclipse.tigris.org/update_1.10.x in the "Work with" field and press Enter. Select "Subclipse" and click the "Next" button.
Follow the prompts to install and restart Eclipse. When Eclipse opens again, go to "Eclipse » Preferences" in the toolbar. Select "Team » SVN" from the left-side navigation tree. You may get this warning message:
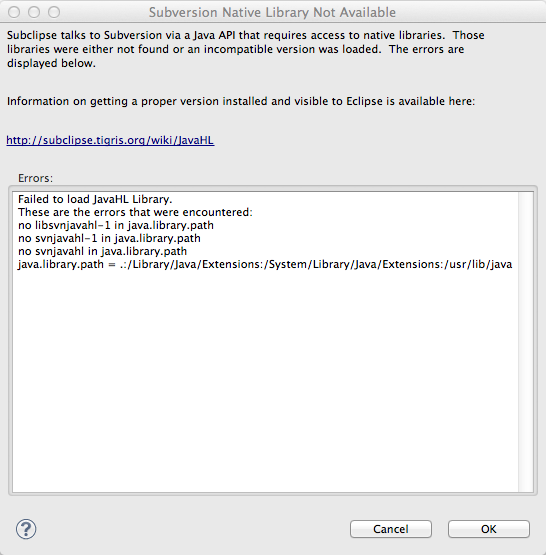
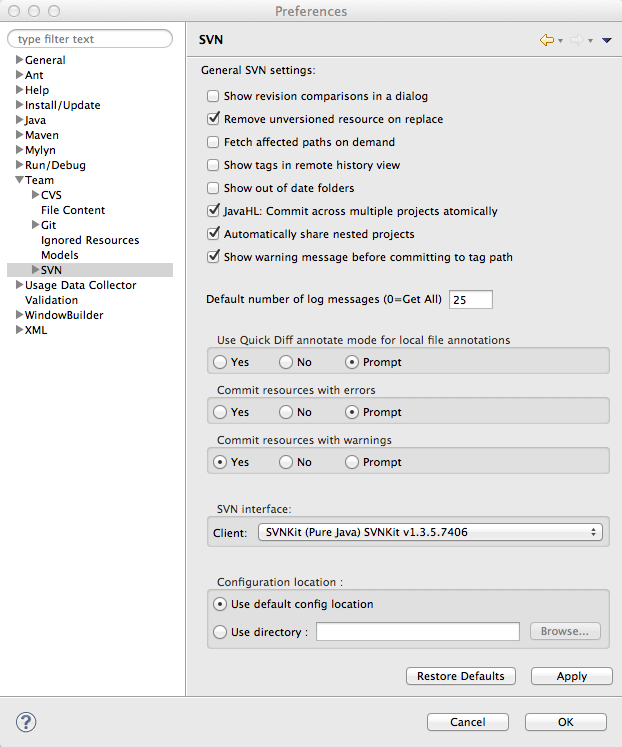
Go ahead and click "OK". In the preferences, change the "Client" value under "SVN Interface" to "SVNKit (Pure Java)" and click the "Apply" then "OK" buttons.
Now, you have Eclipse and Subclipse all setup! Next, you will create your first SVN-linked Java Project.
SVN Repository Setup
To create a Java Project in Eclipse that is connected to your SVN repository, you need to first setup your SVN repository in Eclipse. Open Eclipse, and then select "Window » Open Perspective » Other" from the toolbar. You'll see the following window pop up:
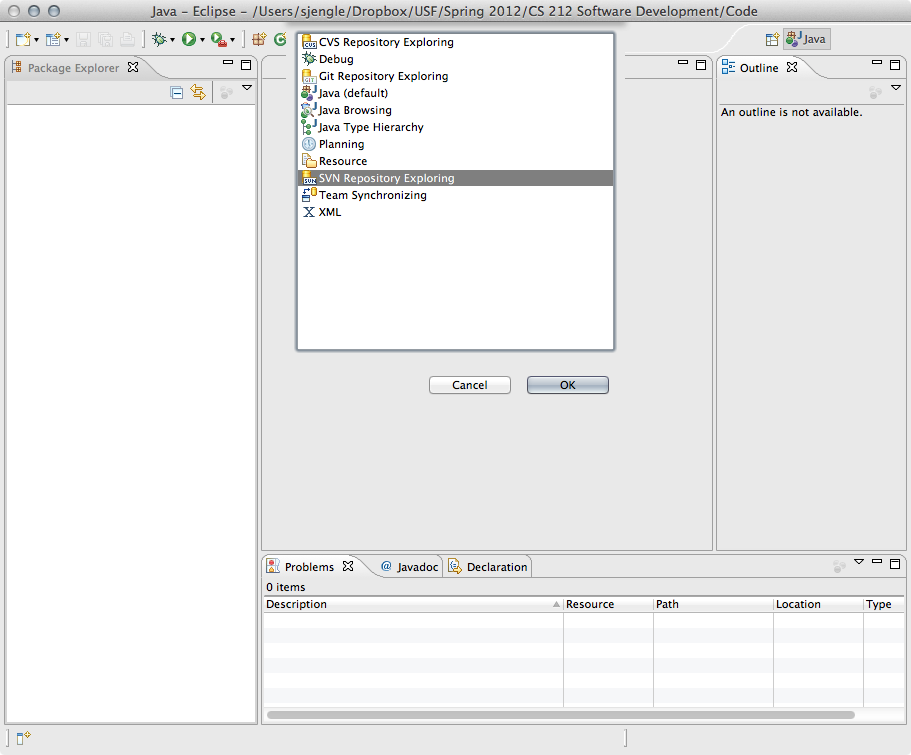
Select "SVN Repository Exploring" from the window and click "OK". Your perspective should change as follows:
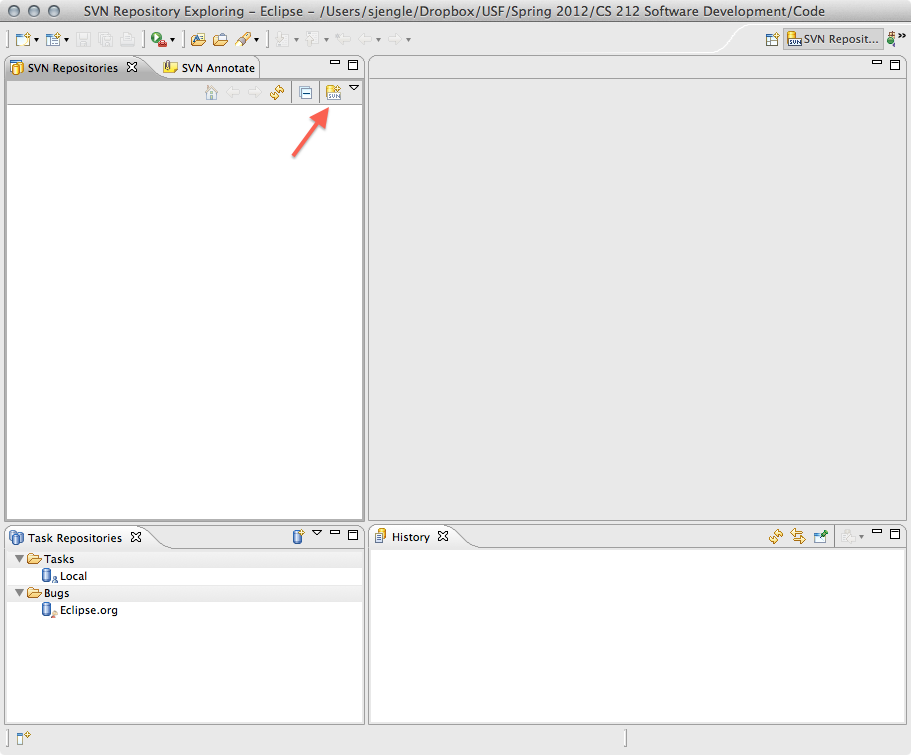
Click the icon with the SVN text and plus symbol (see above). Enter your SVN repository in the window that opens up. Your SVN repository is:
https://www.cs.usfca.edu/svn/username
where username should be replaced with your CS username. It is very important that your SVN repository starts with https:// otherwise you will run into problems.
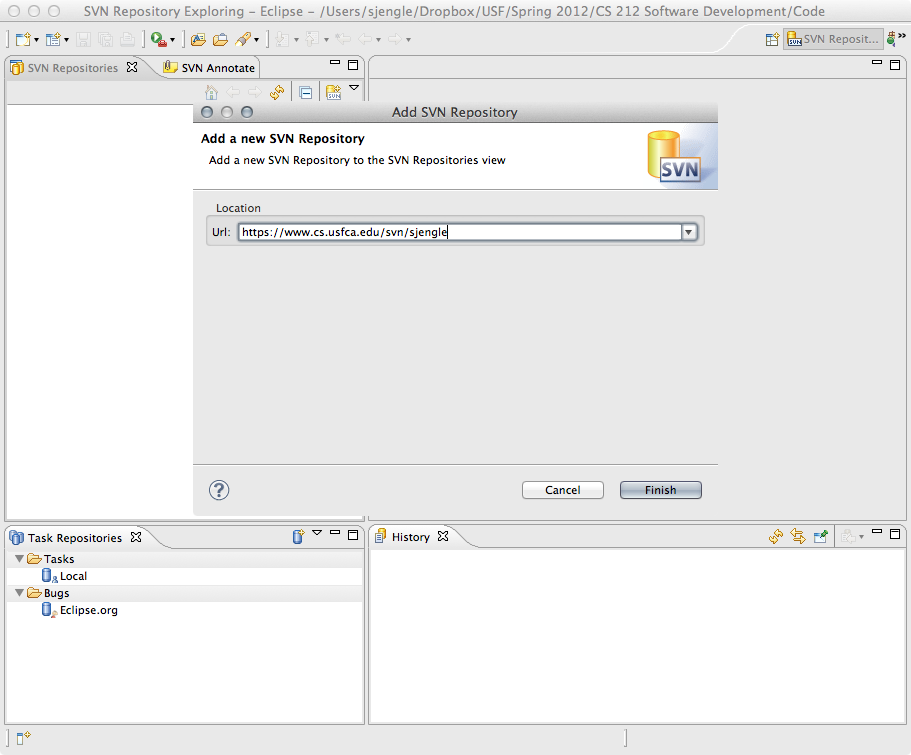
You should be prompted for a password. This is your CS account password, not your USF Connect password. If you have trouble accessing your account, please contact CS Support.
You should then see your repository show up. Right-click your repository and select "New » New Remote Folder" from the menu. Enter the folder name specified by your course.
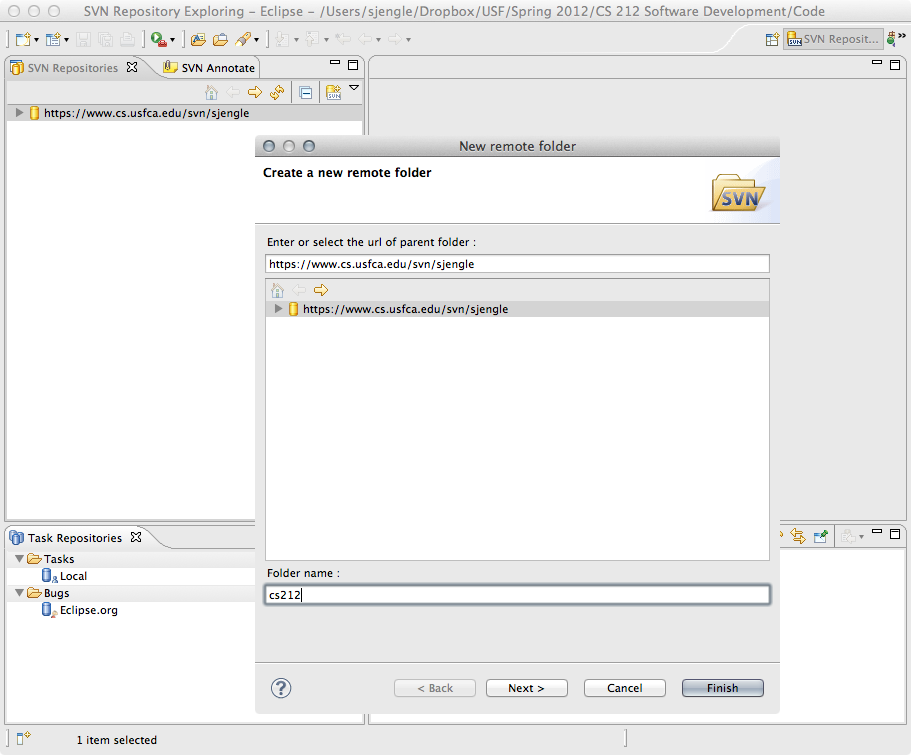
For example, CS 212 Software Development uses cs212 in all lowercase as the folder name. You must enter this part EXACTLY with all lowercase letters, otherwise you will run into submission problems in the future.
Java Project SVN Setup
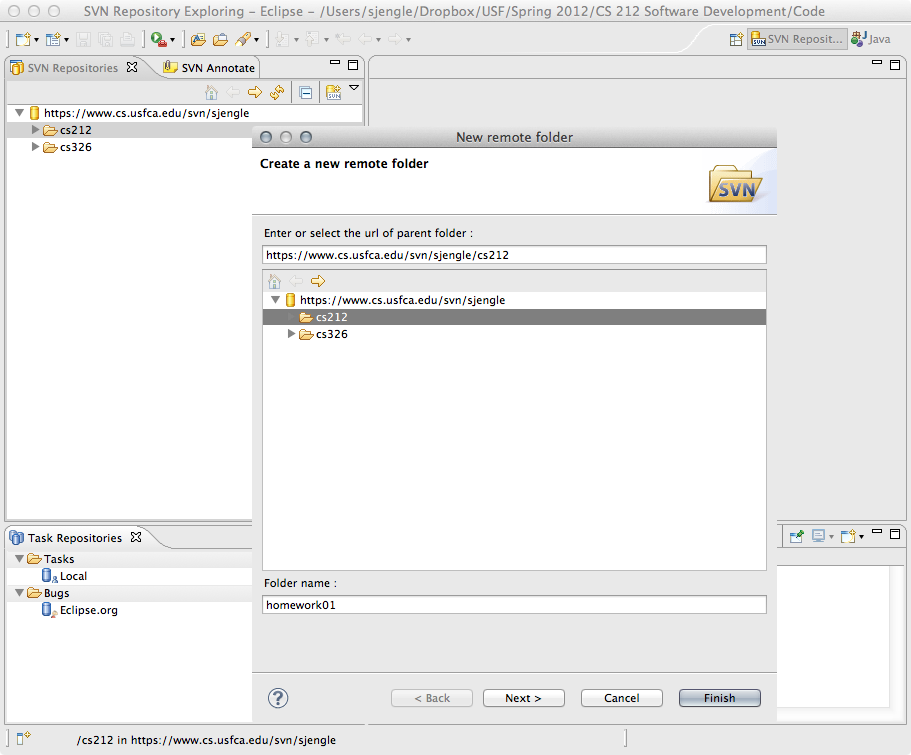
To create a Java project that is connected to your SVN repository, you need to first create a folder in your repository. Go to the SVN Repository perspective by clicking "Window » Open Perspective » Other » SVN Repository Exploring", and open your SVN repository. Right-click on your cs212 folder (or whichever specified by your course) and select "New » New Remote Folder".
Lets assume you are working on the first homework. In that case, you need to create a folder named homework01 (in all lowercase).
After clicking "Finish", right-click your new homework01 folder and select "Checkout" from the menu. You should see the following window:
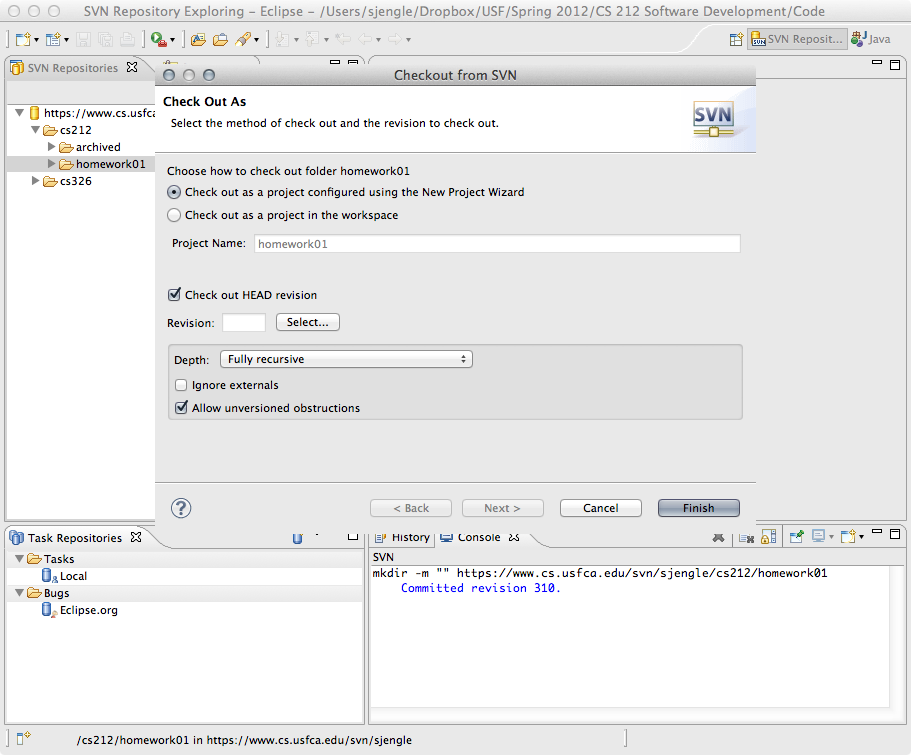
When you click the "Finish" button, you'll see another pop up window. Select "Java » Java Project" and click "Next".
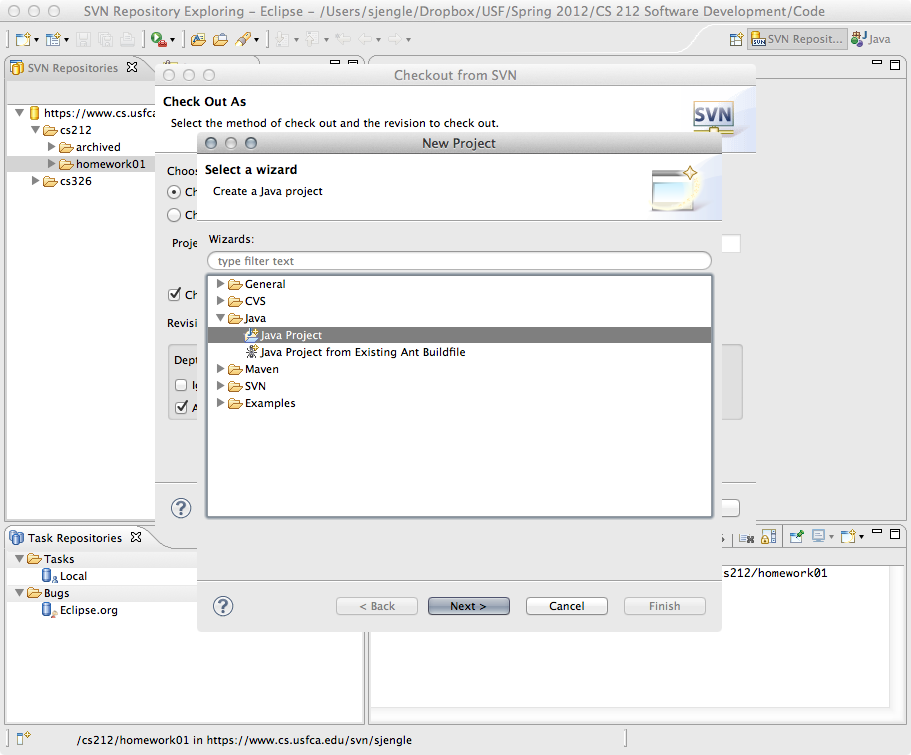
Enter homework01 as the project name and click "Finish". If you are asked to switch to the Java Perspective, click "Remember my decision" and the "Yes" button. You can add your first file to the Java Project by right-clicking the "src" directory and selecting "New » Class" from the menu.
Now, you can right-click and select "Team" to access SVN commands like commit and update. You can tell whether your files need to be committed by looking at the icon decorations in Eclipse:
A file that is marked as "dirty" needs to be committed, an "unversioned" file hasn't been added to your SVN repository yet, and so on. See the other Resources for more basics on using SVN.